Creating A React App in 2026 is EASY with Vite
Learn how to set up your development environment and create your first React application using modern tools and best practices.

Introduction
Getting started with React is no longer as complicated as it was before.
In this video, we will learn about the fastest way to bootstrap a modern React project.
No, we are not going to use the deprecated CRA or create-react-app that has been causing pain for developers for centuries.
But we will employ something called Vite, which means blazingly fast in French.
Prerequisites
So What’s the only thing that stands between you and your first React app? You need a runtime that lets you run Javascript outside the browser — Node.js.
Start by heading to the official Node.js website, hit the Get Node.js button, and pick your operating system–either copy and paste the shown commands to your terminal or just download the corresponding binary.
After running the command or downloading the binary, let’s confirm that it’s indeed installed by opening our terminal, and typing
node --versionIf a message that looks like this appears after running the command, then congratulations—Node.js is successfully installed.

Setting Up Vite
Now, that Node.js is ready, one command is all it takes to get your entire React project up and running.
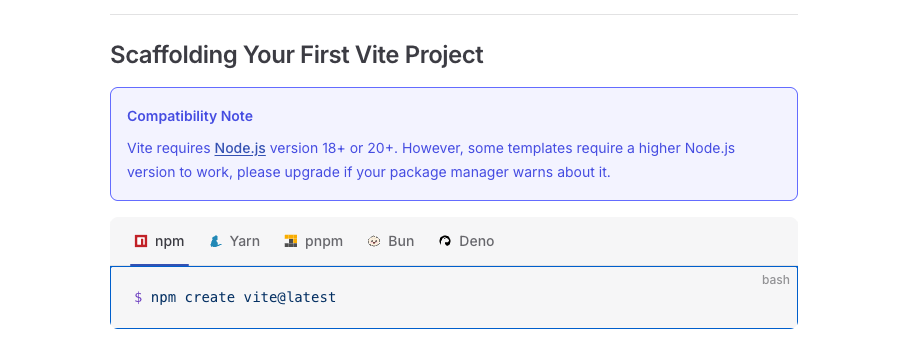
Head over to the Vite website, hit get started, and scroll down until you find this command.
This command creates your project boilerplate and installs both Vite and React for you. Vite itself mainly handles two things:
-
It serves your code during development while offering features such as Hot reload.
-
It bundles your JavaScript, HTML and other assets together when you’re ready for production.
Node.js comes with npm out of the box – a package manager that installs your project dependencies. But I personally use pnpm instead, and here’s why it’s better:
-
It caches your dependencies globally.
-
It reuses them across projects.
That makes everything way faster and more economical, especially if you use mobile data.
npm create vite@latestSo you can either copy this npm command and run it straight away or install pnpm globally:
npm install -g pnpmIn case you’ve gone the pnpm path and installed it globally, you just have to replace npm with pnpm in the previous command.
pnpm create vite@latestProject Configuration
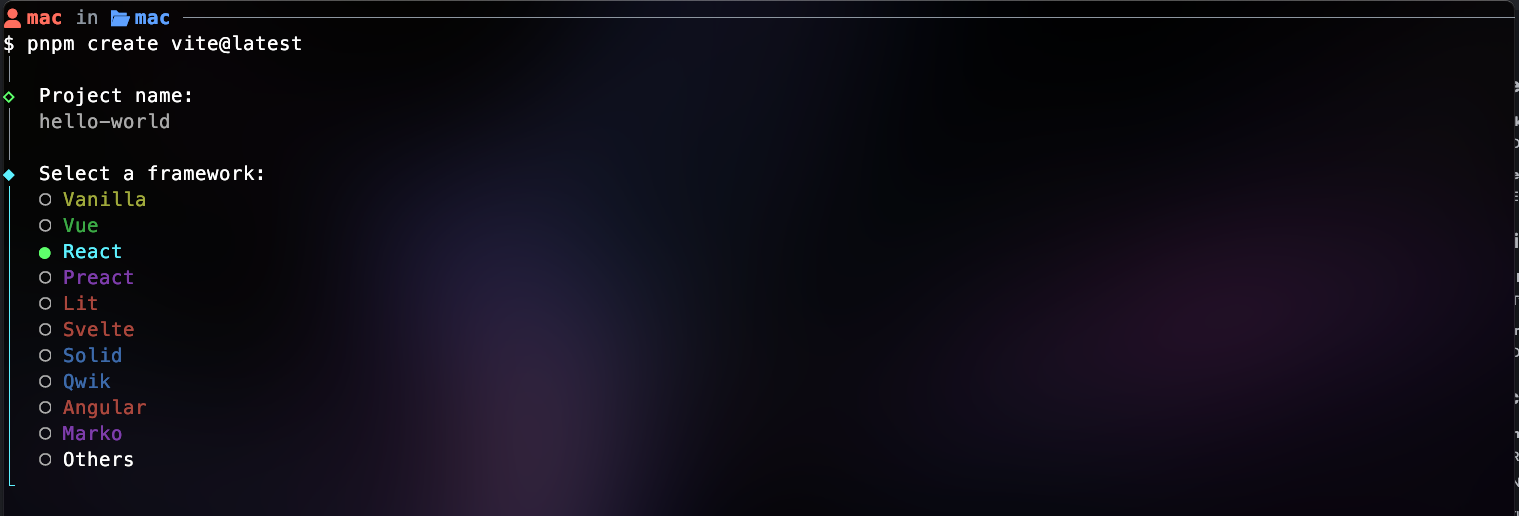
Now that we’ve run the command, Vite-cli is going to walk you through a quick setup.
Let’s go with hello-world as a project name.

Since we are building a React app, let’s select React.
Now it’s asking us to choose between JavaScript or TypeScript. Honestly, I prefer TypeScript because its static typing improves IDE autocompletions and makes the developer experience much smoother.
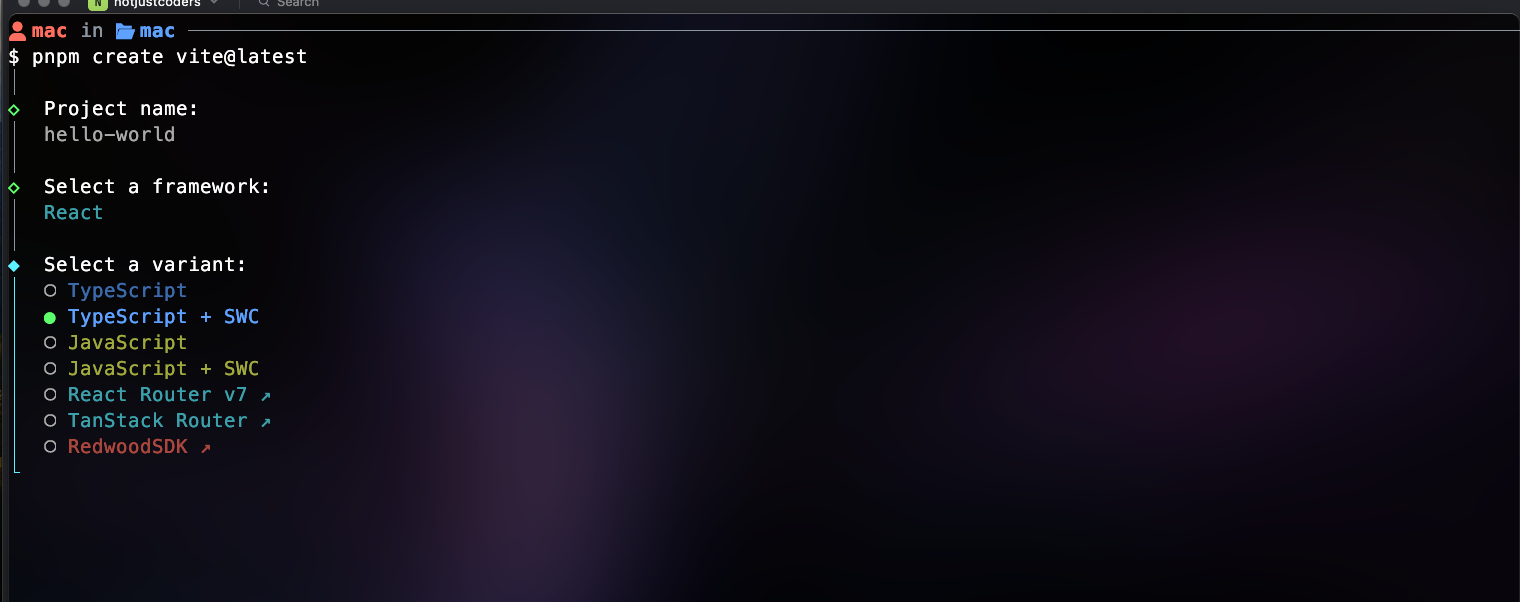
You might be wondering about what SWC even is. It’s a blazingly fast compiler that will speed up your development experience by almost 20X. Nobody hates speed, so let’s select Typescript + SWC and hit enter.
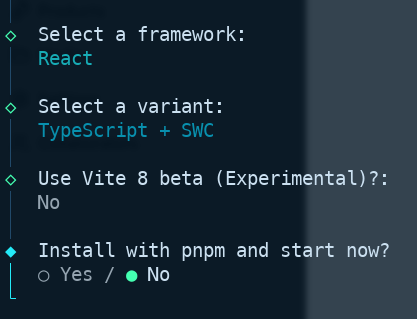
Let’s just skip the two remaining options.
Installing Dependencies
The moment you hit enter, Vite-Cli creates your project.
As soon as it’s done, navigate to it by typing cd hello-world.
After that, install the dependencies by running “npm install” or “pnpm install”.
npm install
# Or
pnpm install
Running The Development Server
Once the installation is done, let’s run the following command.
pnpm run devThe latter will start the development server on http://localhost:5173.
Just click on this URL while holding Ctrl or just copy-paste it into the browser.
Finally, your project is ready.
Open it using your preferred IDE, go into the App.tsx file located within the src folder, change something there, and voilà, the change is reflected instantly on the web page.
Conclusion
So this is all it takes to get your project up and running with VITE, LITERALLY, one single command!
But looking at this file tree might be a source of anxiety, right?
So instead of blowing everything, we must understand the generated boilerplate code.
In the next article of the series, we are going to explore every file and folder of this intimidating Halloween tree.
Until then… happy coding!