Creating Your First React Component is EASY
Learn how to create and use React components, the building blocks of any React application.
Introduction
Before creating your first component, you need a project, right?. And honestly, what’s better than a single command to do so, thanks to Vite CLI?
pnpm create vite@latest
# Or
npm create vite@latest
Going through the installation wizard steps should be straightforward, but if this is your first time exploring the React or the Node.js world, I highly advise you to check out the previous article in the series.
hello-world/
├── public/
│   └── vite.svg
├── src/
│   ├── App.css
│   ├── App.tsx
│   ├── index.css
│   ├── main.tsx
│   └── assets/
│       └── react.svg
├── node_modules/
│   └── ...
├── .gitignore
├── index.html
├── package.json
├── tsconfig.json
└── vite.config.ts
In this article, you’ll learn all you need to know about creating React components.
Without any further ado let’s dive in.
Creating Your First React Component
Now that we’ve initialized our Vite project, let’s jump over to the App.tsx file, located within the src directory.
Once you’ve done so, you’ll notice that Vite comes with a predefined counter-example.
As you can see, a React component is just a simple JavaScript function that starts with a capital letter and returns a code that looks just like HTML.
function App() {
  const [count, setCount] = useState(0);
  return (
    <>
      {/** more code here ... */}
      <div className="card">
        <button onClick={() => setCount((count) => count + 1)}>
          count is {count}
        </button>
      </div>
      {/** more code here ... */}
    </>
  );
}
Simplifying the App Component
Let’s simplify this code by deleting everything inside the App function and making it return a simple container div that wraps an h1 header and an unordered list ol with a few random list elements li.
function App(){
  return (
    <div>
      <h1>This is my first react component</h1>
      <ol>
        <li>Wake up</li>
        <li>Code</li>
        <li>Eat</li>
        <li>Sleep</li>
        <li>Repeat</li>
      </ol>
    </div>
  );
}
Creating a New Image Component
When implementing UI interfaces in React code, we tend to mentally break it into many components. So how can we create another component that renders a random image and then reuse it inside the App component?
As we said before, it’s a matter of wrapping your HTML in a function.
Let’s place it just above the App component. The component returns an img HTML tag with the following attributes:
-
An alt attribute to support screen readers.
-
And an src attribute that we will set equal to a URL generated by Lorem Picsum. — It’s a website where you can get a URL that loads a random image every time the page gets refreshed.
function Image(){
  return <img alt="Blog post image" src="https://picsum.photos/500/400" />;
}
We didn’t have to use the parentheses in the
Imagecomponent because the returned code is only written in a single line, in contrast with theAppcomponent where we had to use parentheses because the code spanned more than one line.
Using the Image Component in App
Next, let’s use it in App. We can call it as we call a normal function inside of the returned HTML, but there is a more optimized way to do it, which is using this tag syntax <Image/>.
function Image() {
  return <img alt="Blog post image" src="https://picsum.photos/500/400" />;
}
function App() {
  return (
    <div>
      <h1>This is my first react component</h1>
      <Image />
      <ol>
        <li>Wake up</li>
        <li>Code</li>
        <li>Eat</li>
        <li>Sleep</li>
        <li>Repeat</li>
      </ol>
    </div>
  );
}
Running the Development Server
The code is ready; all that remains is to start the development server by running the following:
pnpm run dev
# or
npm run dev
Subsequently, we need to head into http://localhost:5173 and inspect the page.
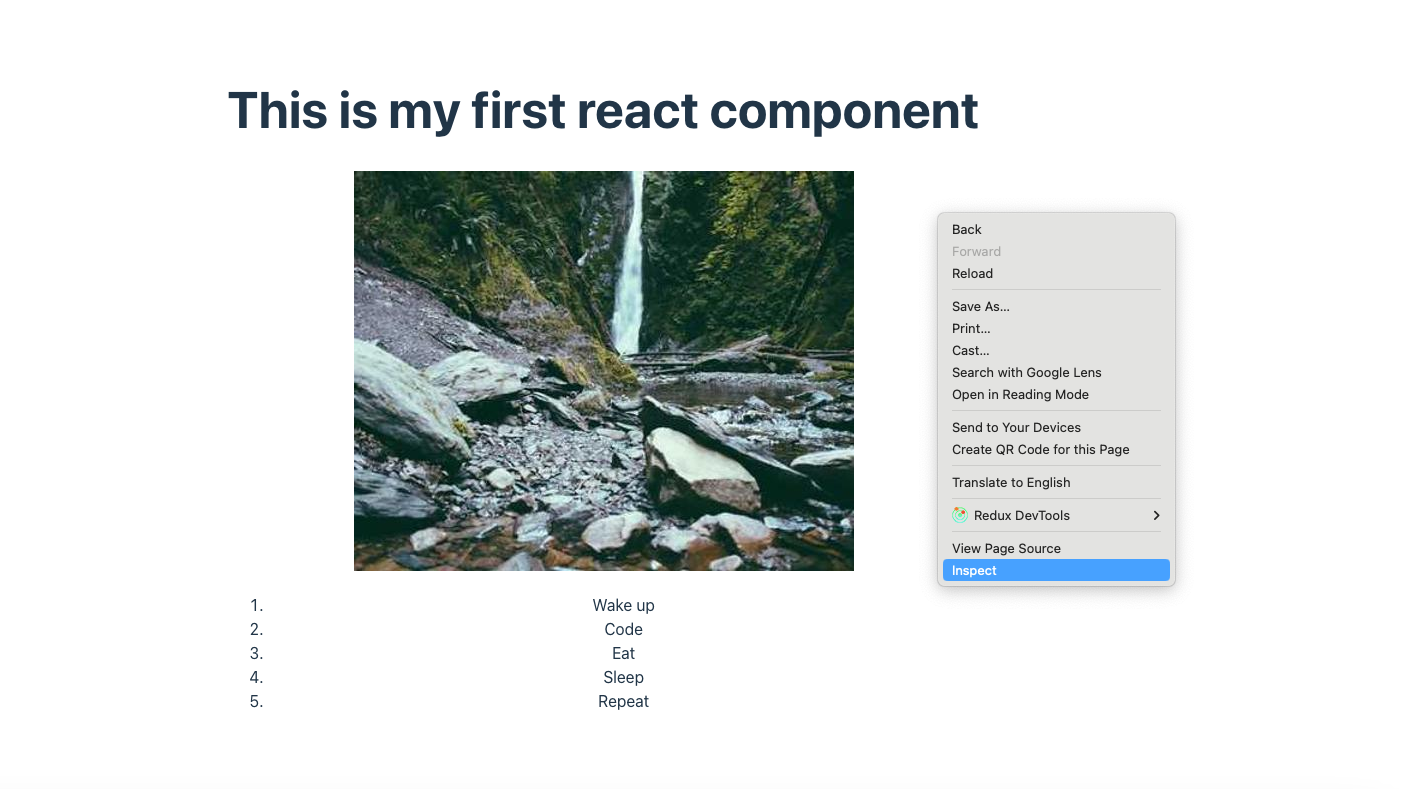
React injects the final HTML into a div known as the root div.
As you can see, the HTML that is returned by the App component and its child Image component got merged together and then injected inside the root div.

Organizing Components into Separate Files
While this works for a small demo, in a real web application, defining all the components in a single app is neither practical nor scalable.
So let’s create a image.tsx file at the same directory level as app.tsx, then just copy the Image function declaration into its own dedicated file.
Every file in Javascript is considered its own closed module. So anything that is declared there is not accessible unless we explicitly export it.
Exporting Components
There are two ways to export our component:
- We can add the export keyword next to it, and then import it in
app.tsxlike this:
image.tsx file:
export Image;app.tsx file:
import { Image } from "./image.tsx";This approach is called normal exporting; a file can have many normal exports.
import {C1, C2 , C3} from "file.tsx"- We can also add the default keyword before the function name when exporting it to indicate that this component is a default export for the image.tsx file.
image.tsx file:
export default Image;app.tsx file:
import Image from "./image.tsx";As the name implies, a file can only have a single default export.
Bonus Performance Information
Before moving on, there is one common mistake that can silently kill your app’s performance: never declare a component inside another component.
Doing this forces React to treat the inner component as “brand new” on every single update. This destroys any chance of caching or optimization, leading to potentiel performance issues.
export function App(){
  // ❌
  function SubComponent(){
    return (
      <div>{/* code... */}</div>
    )
  }
  return ( /*code...*/);
}
Html Files can get really big, and just making sure that tags are closing properly is honestly a big drag.
React takes a modular approach by dividing the problem of building complex interactive web pages into smaller sub-problems or building blocks known as components.
Conclusion
But there’s an important point that we avoided talking about during this article.
Can you guess? — Yes, that’s right; we kept saying “HTML-like code.” But we never explained why.
Well, because that’s not HTML code; it’s actually a syntax extension of JavaScript, and it’s called JSX!
In the next article of the series, we will reveal more secrets 🤫 about this mystery. Until then, happy coding.